Executions#
In n8n, the term "execution" refers to the process of carrying out the instructions in a workflow. Executions can be triggered manually, by a schedule, via incoming webhooks, or through other internal and external events. n8n maintains a full record of node inputs, outputs, and any errors encountered, which can be viewed in the execution history for debugging or auditing.
Production executions#
- Triggers
Manual Executions#
Instead of being triggered by an external event (like a webhook, schedule, or application node), a manual execution occurs when a user selects “Test Workflow” while editing in the canvas, and the workflow runs using either predefined test data or real inputs configured in the nodes.
Manual executions are an essential part of creating, editing, testing and debugging workflows.
Partial executions#
Partial executions are manual executions that only run a subset of your workflow nodes. Running only part of the workflow has a number of advantages when actively editing or troubleshooting:
Faster Debugging: You don’t need to re-run the entire workflow from the beginning. You can test just the section you're working on, saving time.
Retaining outputs: You can reuse previous node outputs or test with a known input, reducing variability and focusing on the logic you’re debugging.
Avoid repeating unwanted actions: For example, sending messages, accessing external websites.
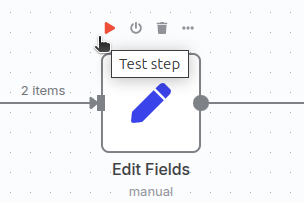
To perform a partial execution, either select the 'test step' icon above the node or open its detail view, and select 'Test step'. This executes the specific node and any preceding nodes required to fill in its input data. You can also temporarily deactivate specific nodes in the workflow chain to avoid interacting with those services while building.
During a partial execution, n8n follows the path from the initial trigger and moves forward along the path of nodes until it finds one which is either un-executed, has an error, or is labeled as dirty (see next section). The workflow execution is then started from that node using existing data.
For errors encountered when running partial executions, see the troubleshooting section.
Dirty nodes#
A 'dirty' node is simply one which has executed successfully in the past, but the resulting output is considered stale or unreliable. It is labeled in this way for information purposes, since if the node were executed again, the output may be different. It is also potentially the point at which a partial execution starts from.
How to recognize 'dirty' node data#
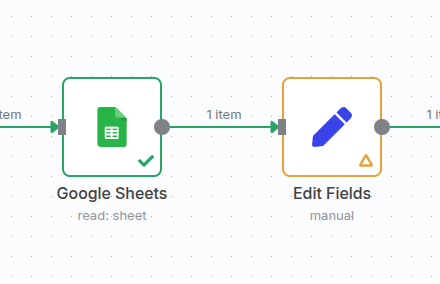
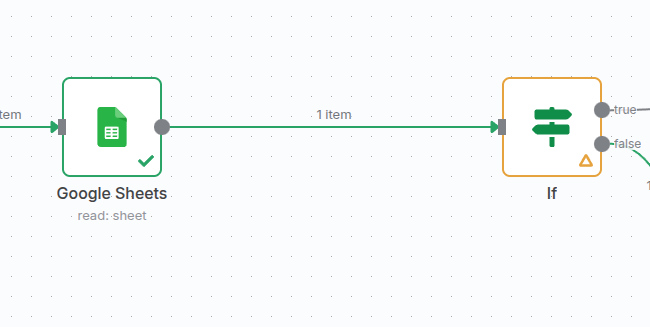
In the canvas of the workflow editor, dirty notes can be identified by a different-colored border and a yellow triangle where previously it had a green 'tick' symbol. For example:
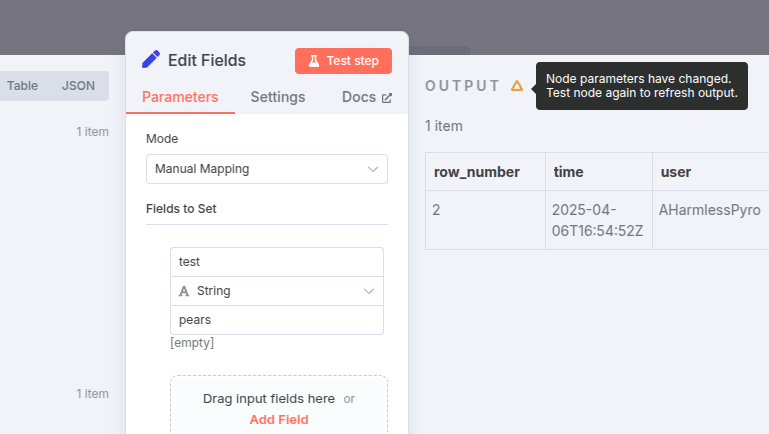
In the node editor view, the output panel will also display the yellow triangle on the output panel. Hovering the mouse over the triangle will show a tooltip with more explanation about why the data is considered stale.
How does a node get to be 'dirty'?#
There are a number of ways that execution data can be flagged as stale, depending on changes you have made. For example:
- Inserting or deleting a node: labels the first node that follows the inserted node.
- Modifying node parameters: labels the node being modified.
- Adding a connector: labels the destination node of the new connector.
- Deactivating a node: labels the first node that follows the deactivated node.
List of other ways a node can become dirty...
- Unpinning a node: labels the node that was unpinned.
- Modifying pinned data: labels the node that comes after the pinned data.
- If any of the above actions occur inside a loop, also labels the first node of the loop.
For sub-nodes, also label any executed parent nodes (up to and including the root) when:
- Editing an executed sub-node
- Adding a new sub-node
- Disconnecting or deleting a sub-node
- Deactivating a sub-node
- Activating a sub-node
-
When deleting a node connected in a workflow...
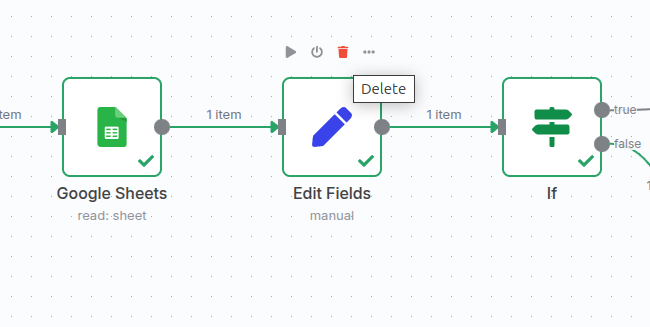
-
...the next node in the sequence becomes dirty
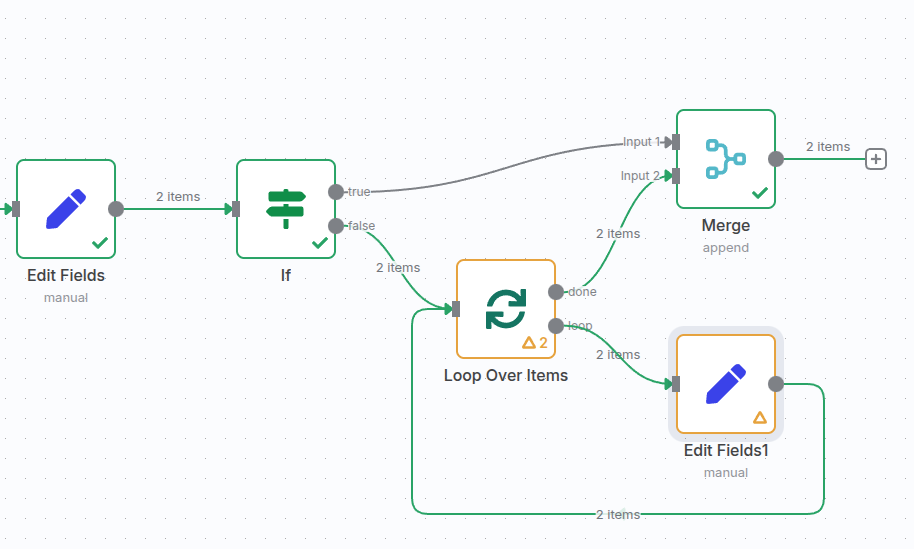
In the case of a loop (using the Loop over Items node), when any node within the loop is dirty, the initial node of the loop is also considered dirty:
Resolving dirty nodes#
The 'dirty' status of a node can be cleared by executing the node again. This can be done by manually triggering the whole workflow, or by running a partial execution (as described in the preceding section) by running 'test step' on the individual node or any node which follows it.
Execution Flow#
- Execution order
- Logic and branching
- Loops
- Sub-workflows
Execution logs#
Execution history#
Execution Status and Lifecycle#
- Queued
- Running
- Completed
- Failed
- Canceled
Inspecting node data#
Debugging failures#
Queuing executions#
- Execution modes
- Workers
- Execution timeout and retries
Best Practices#
- Design tips
- Performance
Troubleshooting executions#
Interpreting stack traces#
Monitoring and alerts#
Common issues#
Resolving manual execution errors#
Error messages for a workflow are displayed in the bottom right corner of the editor window.
Connect a trigger to run this node
This error message appears when you try to perform a partial execution without connecting the workflow to a trigger. Manual executions use the same execution logic as production executions when possible. Part of this includes requiring a trigger node to determine from what point the workflow logic should execute.
Please execute the whole workflow, rather than just the node. (Existing execution data is too large.)
This error can appear when performing partial executions on workflows with large numbers of branches. Partial executions involve sending data and workflow logic to the n8n backend in a way that isn't required for full executions. This error occurs when your workflow exceeds the maximum size allowed for these messages. To work around this, consider using the limit node to limit node output while running partial executions. Once the workflow is running as intended, you can deactivate or delete the limit node before re-activating production execution.